
The Google Keyword Planner
The Google Keyword Planner is perhaps the most popular keyword research tool created on the internet. I have never heard of a PPC advertiser that never used it before. The tool is powerful, and the data comes directly from Google databases gives users added assurance. As a result, it has become the main tool to use for any keyword research or campaign build. The Keyword Planner may look rather easy and intuitive to use. Most of us use this to find keyword suggestions, volumes, and top-of-page bid costs. Great. But do you also know about these four hidden tools lying within Keyword Planner?
Let’s find out more in this post.
1. Competition (Indexed Value)
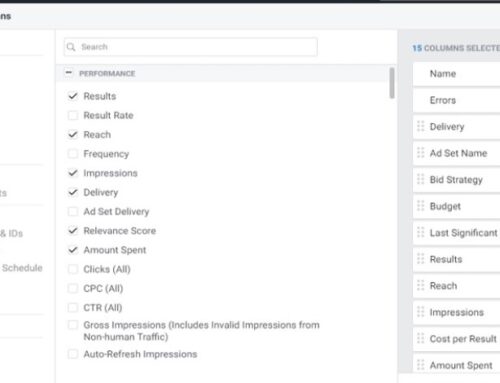
Competition (Indexed Value) is a metric within the report. It is not enabled by default, so you do not see it when looking at your keyword results. To enable this, go to Columns > Modify Columns. Once inside, you will see a range of metrics that the Keyword Planner uses. Click the checkbox for “Competition (Indexed Value).”


So what is this all about? You probably know of the “competition” metric, where keywords are graded low, medium, or high in terms of competitiveness. This metric is similar, except it grades the keywords on a 0-100 scale, 0 being least competitive and 100 most competitive. The metric is derived from dividing the total number of ad slots filled by the total ad slots available.
As you all know, on every page, there can only be a limited number of ads. At the top of page 1, only a maximum of four ads can show at any given search. At the bottom is about 3. So there are maximum spots of 7 ads on the first page. If the Competition (Indexed Value) is 100 for a keyword, you know that all the ad slots are getting filled promptly. It’s a very competitive keyword, and your competitors are mostly bidding for it. But for example, if the value is only 50, then you know that it’s moderate in competitiveness, as the ad spaces are only filled half the time.
This metric gives you an estimate of how much competition you will be expected to go against. With this metric, you also get to roughly know how often your ads get to show on page 1.
An additional tip, if you see a high indexed value for your company name, chances are that your competitors are bidding for your name.
2. Refine Keywords For Negative Keyword Research
When looking at the results from the keywords you input, you will be able to see a table called “Refine Keywords” on the right side of the dashboard. As of writing, it is still in the beta phase. But this is a powerful tool as it groups up all the keywords into categories. Google’s machine learning automatically learns and understands the semantics of the keywords and groups them up into relevant categories. So instead of combing down every single keyword out of the thousands, you can use the table and drill down into the most relevant aspect of your business.
Find categories that don’t suit your business
Because of these categories, you can now easily tell which ones that are not relevant to your business. Let’s see the example below. We did a keyword research for our virtual coffee company client. Now looking at the categories in the Refine Keywords section, we find that we do not sell any green coffee beans, so we can uncheck it to exclude them from populating the results. Later we can then drill into it to add to our negative keyword lists.

3. Group View
Group view! Another hidden tool that almost no advertisers use. To use group view, click on “Keyword View” at the top right of the table, just beside “Columns.” Now click the drop-down and select “Group view.” Instead of the keywords showing in the rows, you will see that it’s has become just groups of keywords. This makes keyword research easier, especially for big accounts. In the example below, you can see that our virtual coffee company keyword research has generated over 2000 keyword ideas. Using the group view cut it down to 200. Still a lot, but way more manageable than before.

Group View Segmenting
Note that we can still segment it out just like we do on the keyword view. You can segment it by searches, competition level, keyword text, and more. Use it to further cut down the clutter to get to the most relevant keywords for your business.

4. Breakdown By Platforms and Date Range
Platforms
Some of you may already know this, but I’m still including it in this list for people who may not know yet. The timeline graph above does not only show keyword traffic over time. You can also see by platforms and date range. Click the charts icon at the right corner of the timeline graph. And it will open up a drop-down where you can see the data by Platform or Location. Platform is powerful because it straightaway gives you an estimate on whether the users searching for these keywords are from desktop, mobile or tablets. For example, if you find that 70% of the keywords come from mobile devices, you know that these customers will be looking at your mobile site, and you should optimize your mobile site well for mobile traffic.
You can also use location if you are selling in multiple countries. It will tell you where these searches are coming from.
Date Range
Date range is another powerful filter you can use inside your keyword planner. By default, it looks back at the performance of the keywords for the past 12 months. But let’s say that your business fluctuates during certain seasons. An example of a florist that may see search traffic boost during February, where it’s valentines day. A chocolate retailer may see a surge in traffic during December due to Christmas celebrations. Filtering your date range to that particular month lets you only see how users are searching for you on that month instead of the whole year.

Google Keyword Planner Summary
Now you understand how to use these four hidden tools to help bring your keyword research skills to the next level. To recap:
- Enable the Competitive (indexed value) to see more metrics on your keywords.
- Use Refine Keywords for your negative keyword research.
- Enable group view to easily understand your data.
- Filter your data by platform and date range to more easily understand your customers.
Remember that the Google Keyword Planner tool is immensely powerful. It is packed with super-valuable insights that you can’t get from most keyword research tools. Third-party keyword tools are great, but their data are usually bought or crawled from bigger companies. While keywords are the bread and butter of Google Ads, you want to make sure you don’t leave out negative keywords in your account.
When choosing keywords for your Google Ads campaigns, you should trust the data from the Keyword Planner first, especially when it pertains to click prices and volume. Because these are directly from Google’s databases. Additionally, third-party keyword tools like SEMrush and Ahrefs can help complement the research you have done and compiled in Google’s Keyword Planner.


")
