
Whether you are managing online marketing efforts or analytics for your business, you may have come across the term “UTM.” UTM parameters are introduced by Urchin, which is the predecessor of the earliest Google Analytics. They are supported out-of-the-box by Google Analytics. This means that no additional configuration is needed on your part other than installing the Google Analytics tag on your site.
What is a UTM?
UTM stands for Urchin Tracking Module. They are parameters tagged at the end of the URL, after the “?” sign to help identify the source and campaign that referred traffic to a specific website. The parameters are then parsed onto GA and used to populate reports. An example of a UTM parameter looks like this (highlighted section):
![]()
UTMs are used for tracking data. They are always added to the end of URLs to record information about clicks, which can be used to analyze the performance of your marketing campaigns. Multiple UTMs can be added to a single URL, tracking the different types of information. In the above example, dissecting the URL parameters, we can see the following traffic information:
utm_medium = social
utm_source = facebook.com
utm_campaign = buffer
You would have noticed that every UTM comes with two components: the UTM parameter and the tracking value. These values then get passed into your analytics tools. So, as a practice, next time when you click on any links, see if they are UTM parameters appended at the URL. If a website is using Google Analytics, you will probably catch one.
Campaign URL builders
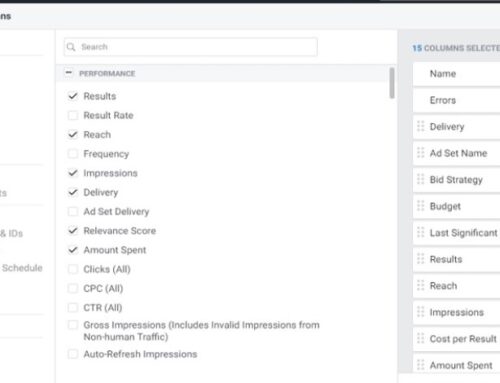
Now let’s move on to Campaign URL Builders. They are the perfect partner to UTM parameters. This tool allows you to easily add campaign parameters to URLs so that you can track your custom campaigns in Analytics tools such as Google Analytics. Now that you know how UTM works, you may be thinking of building them out by hand. But manual tagging may be too sophisticated for most people and is also prone to human errors. That is why Google provides tools like the Google Campaign URL Builder to ease out the process. At Samurai PPC, we recommend you do not perform manual tagging at all.

All you have to do is feed into the system whatever you want to include, along with your final URL, and it will push out the result. The first four rows are compulsory. Campaign Term and Content are optional and seldom used by advertisers.

Click “Copy URL” and paste it into the marketing campaigns that you are measuring.
What is GCLID?
Now let’s move on to GCLID. They were introduced in the 2010s by Google. It stands for Google Click Identifier. It is only used for Google Ads campaigns. But the purpose is the same as the UTM parameter. It is appended at the end of the URL and shares information with Google Ads on the click information and traffic source. Now, this is where it diverges from its older brother, UTM. GCLIDs are encrypted and can store way more information than UTM. This is an example of a GCLID.
https://www.samuraippc.com/blog/this-article/?gclid=EAIaIQobChMIsOuBpdnl5QIVEYzICh1T0g2FEAA YASAAEgJAV_D_BwE
It is encrypted and can only be deciphered by Google software. They then get populated into your Ad reports. The GCLID holds a wealth of information to your marketing data, here are just some of the examples.
- Query match type: how your keyword was actually matched to the search query.
- Ad group: the ad group associated with the keyword/creative and click.
- Final URL: Google Ads Final URL
- Ad Format: text, display, or video
- Ad Distribution Network: Google Search vs Google Display
- Placement domain: the domain on the content network where your ads were displayed.
- Google Ads customer ID: the unique three-part number that’s assigned to your Google Ads account.
- Hour of day the URL was clicked.
- Placements: where your ads on the content network were placed.
- Keyword Positions: what position your ad appeared in on Google Search.
- Display targeting
- Video campaigns
- Shopping campaigns
Fortunately, you don’t have to set up this. Google has done the heavy lifting for us. It is automatically enabled when you create any Google Ads account. But you may access it through Account Settings. (Don’t ever turn this off unless you are prepared to do manual tagging!)
Confirm auto-tagging works for your site
If your website is redirecting users from your final URL, you need to do additional checking to ensure GCLID is passed on correctly. Below is a guide from Google to show you how a test can be performed on your website.
Use the Chrome Developer Tools and follow the instructions here to check if auto-tagging works on your site before setting it up.
If you don’t see the gclid parameter appended to your URLs after the page is fully loaded, then it’s likely that your website isn’t configured to handle query parameters in a way that lets auto-tagging work.
- Open a new tab in Chrome. Open the Chrome menu, then click More tools > Developer Tools to open the Chrome Developer Tools. Click the Network tab. This pane shows the network (HTTP) requests for the page being loaded and must be opened before the page is loaded.
- Copy your Google Ads final URL.Note: If you’re using a final URL with a tracking template or custom parameters, follow these instructions to get the Click URL (the URL customers will actually click).Paste this URL into the Chrome address bar, but don’t load the page yet. In the address bar, append a test Google Ads auto-tagging query parameter, like
gclid=TeSter-123. This makes the full URL:http://www.example.com/?gclid=TeSter-123 Load the URL and watch the network requests load.
If it is working, you will see the GCLID appended in the address bar when the page finishes loading.
Final words
UTM parameters are mainly used for analytics software like Universal Analytics and GA4. In contrast, GCLID is only used for Google Ads marketing. They both have very similar functions and purposes. Mainly to pass important information and store it in your account. If you link your Google Ads to Analytics, the information stored by GCLID can get passed into analytics for further reporting.
As an additional measure, perform the configuration above to check if your GCLIDs from your ads are passing correctly. And if you are building Campaign URLs, always build your UTM Parameters with a Campaign URL Builder such as one created by Google themselves.


")
